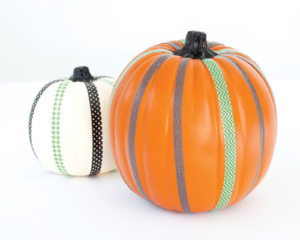
Have you graduated from the pumpkin-carving phase? Or have you grown tired of all orange all the time? Try this no-mess, no-fuss, lasts-all-season-long foray into pumpkin decoration!

Costumed Pumpkins
SUPPLIES:
Real or faux pumpkins
Paintbrush
Black acrylic paint
Washi tape, in Halloween-themed patterns or colors
Scissors
Decoupage medium
INSTRUCTIONS:
1. Paint the pumpkin stems black and let them dry completely.
2. Select one washi tape pattern and, starting at the base of the stem, press a strip of tape vertically to the base of the pumpkin.
3. Repeat Step 2 on the opposite side of the pumpkin with the same tape (visually splitting the pumpkin in half).
4. Press two more lengths of tape on the opposite axis so the four pieces of tape split the pumpkin into quarters.
5. Select a second washi tape pattern and place evenly spaced strips between the four original strips. (Depending on the size of the pumpkin and the width of the tape, you may add or subtract strips of tape as desired.)
6. Trim the ends of the tape around the stem and at the base of the pumpkin. Wasn’t that easy? Optional: Coat the pumpkin in decoupage medium to keep the strips in place.
Excerpted from Amy Anderson’s Washi Tape Crafts (Workman).


No Comments