Excerpted from @mister_krisp‘s (aka Jessica Siskin’s) Treat Yourself!: How to Make 93 Ridiculously Fun No-Bake Crispy Rice Treats.
Preorder the Book
Indiebound | B&N | Amazon | Workman
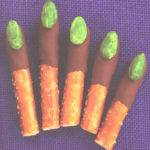
Okay, seriously. How cute are these? These handheld treats are dessert overload: Are they ice cream? Are they crispy treats? IDK, but I don’t care as long as they taste good. Besides being incredibly easy to make, the store-bought cones make them easy to eat without getting your hands sticky. Customize these treats with colorful sprinkles, food coloring, or even flavored extracts—I love mixing mint extract, green food coloring, and chocolate sprinkles to make mint chip, or using chocolate rice cereal, crushed almonds, and a few extra mini marshmallows mixed in later to make Rocky Road!

Crispy Rice Ice Cream Cones
MAKES 12 ICE CREAM CONES
Ingredients
- 8 cups crispy rice cereal
- 6 cups marshmallows
- 4 tablespoons butter
- 10 drops food coloring
- Cooking spray
- 12 wafer ice cream cones (flat bottomed)
- Round rainbow sprinkles
Instructions
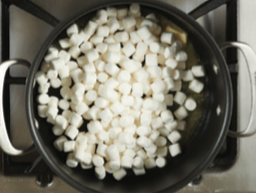
1. In a large stockpot, melt the butter over low heat until it’s 80 percent melted (see photo), about 1 minute 20 seconds. Note: If the butter begins to sizzle, lower the heat. It should melt very slowly.

2. Add the mini marshmallows and stir gently, coating them with melted butter, about 30 seconds.
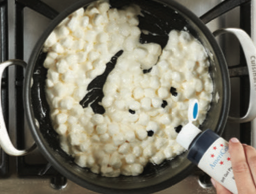
3. When the marshmallows are about 80 percent melted (when you can still see the individual marshmallow shapes but they are beginning to run together), add the food coloring. Stir for another 15 seconds and then turn off the heat.
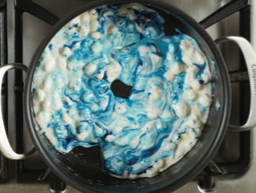
4. Stir gently until the color is well distributed but the marshmallows are still only about 80 percent melted, about 35 seconds (you should still be able to identify individual pieces within the melted ones). Note: If the marshmallows melt too much, the mixture will be too hot to handle—wait 1–2 minutes and then mold quickly!
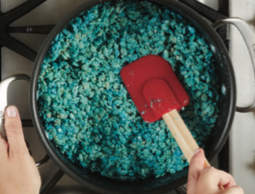
5. Add the cereal and mix well, until the marshmallows and cereal are fully combined, about 40 seconds. Do not overmix! Once done, pour the mixture onto your work surface.
6. Generously coat your hands with cooking spray and press a small amount of mixture into each of the cones, filling them to the top.

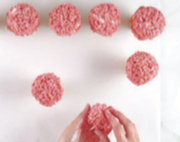
7. Taking one small handful, mold one at circular patty slightly larger than the tops of the cones.

8. Press the patty on the top of one of the cones.
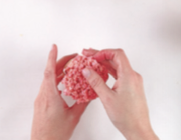
9. Take one handful of the mixture and mold it into a ball.
10. Press the ball on top of the patty shape on top of the cone, and place the cone standing up on the work surface.

11. Repeat Steps 7–10 for the remaining 11 cones. Pour a handful of sprinkles into a bowl and, one at a time, gently press each cone into the sprinkles until they stick.


No Comments