Planning a cookie decorating party? Take your cookie art to the next level with a few inexpensive pieces of equipment and foolproof recipes for rolled sugar cookies and royal icing. Add your own decorative flourishes, and enjoy!

Cookie Tools
While you can decorate cookies with not much more than basic baking supplies, a plastic bag, and a batch of royal icing, the following list will make the task more efficient and fun.
- Waxed paper—for quick and easy rolling/chilling/cutting.
- Cookie slats—for perfectly even cookies.
- Rolling pin—you probably have one on hand.
- Cookie cutters—a round biscuit cutter is versatile; we use it in a number of designs.
- Parchment paper—for easy stick-free cookie baking
- 2-cup airtight plastic containers—to store royal icing.
- Pastry bags—for piping royal icing. In a pinch, you can use a quart-size ziplock freezer bag. Insert the coupler and tip in one corner of the bag. No coupler and tip? Cut the tiniest hole possible in the corner of the bag, which will give you a similar effect to using a #2 tip.
- Metal decorating tips—a #2 tip is very useful.
- Plastic decorating tip couplers—makes changing tips easy.
- Twist ties—useful for closing pastry bags.
- Plastic squeeze bottles—for flood icing.
- Small paintbrushes—for luster dust.
![]()
Rolled Sugar Cookies
Makes 30 2 ½-inch cookies
Now that you’ve got your cookie decorating gear, here’s a simple rolled sugar cookie recipe guaranteed to please.
Ingredients
- 3 cups all-purpose flour
- 1⁄2 teaspoon salt
- 1 cup (2 sticks) unsalted butter, softened
- 1 cup sugar
- 1 large egg
- 2 teaspoons vanilla or 1 teaspoon vanilla plus zest of 1 lemon (Instead of vanilla, you can use other extracts such as almond or peppermint, which we like for candy-cane shapes. If you’re going to be decorating with royal icing, make sure the cookie and icing flavorings are complementary.)
- Food coloring (if your cookie design calls for it)
Instructions
1. Preheat the oven to 350°F.
2. Whisk together the flour and salt in a medium bowl.
3. Cream together the butter and sugar with your mixer until light and fluffy. Add the egg, vanilla, and lemon zest (if you’re using it) and mix until well blended.
4. With the mixer on low, gradually add the flour mixture to the butter mixture until the two are thoroughly blended. If your design calls for adding food coloring, do so now, and blend well.
5. Turn the dough onto a work surface and divide into two or three equal portions. Form each one into a rough disk. Now you’re ready to roll, chill, and cut out cookie shapes.
6. Place a piece of waxed paper about the size of your cookie sheet on a flat rolling surface. Place a disk of cookie dough on top of the waxed paper, and another sheet of waxed paper over the cookie dough. Use your hand or rolling pin to slightly flatten and evenly distribute the dough across the paper. Roll the pin over the waxed paper-covered dough, trying to keep the dough as uniformly thick as possible.
7. Slide the rolled-out piece of dough (paper and all) onto a cookie sheet and refrigerate until it’s firm, 20 to 30 minutes.
8. When the dough is firm and stiff, transfer it from the refrigerator to your flat work surface. Work with one piece of dough at a time, leaving the others to chill in the refrigerator until you’re ready to cut them. Peel back the top waxed paper from the dough and cut your desired shapes. Try to get as many cookies as possible out of each rolled-out piece of dough.
9. Remove excess dough from around the shapes. Transfer the cookies to a parchment-lined cookie sheet.
10. When you’ve cut as many cookies as possible from all your rolled dough, gather the dough scraps into a ball and roll it again, using the same waxed-paper method. Continue to cut cookies and reroll the dough until you’ve used all the dough, chilling the rolled-out dough whenever it becomes too sticky to work with.
11. Bake cookies in the middle rack of your oven for 12 to 16 minutes or until they start to turn slightly golden around the edges.
12. Cool the cookies completely before icing or decorating.
Royal Icing
Lemon juice is our favorite royal icing flavoring, and vanilla extract is a good all-purpose flavoring, as well. (You can experiment with other extracts too — for example, use peppermint in the icing for candy-cane cookies.)
Pro Tip: Make sure that your bowls are spotless—any amount of grease will prevent the icing from whipping properly!

1. Combine all ingredients in the bowl of your electric mixer.
2. Beat on high for 5 minutes if you’re using an electric stand mixer or for 10 minutes if you’re using an electric hand mixer. (If your mixer has multiple attachments, use the paddle.)
3. When you reach the desired consistency, it’s important that you immediately cover the mixture (it dries out quickly) or divide it into separate airtight containers for coloring (add food color drops one at a time!).
![]()

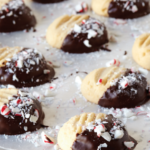
For other cookie decorating ideas, check out Cookie Craft Christmas by Janice Fryer and Valerie Peterson—just $2.99 for the holidays!
GET THE BOOK: Amazon | B&N | ebooks.com | Google Play | iBooks | Kobo
No Comments