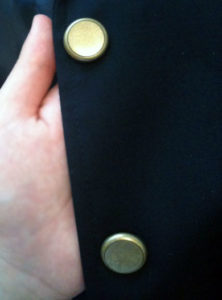
My sad, undone button
I’m on my way to work, steps away from the subway, when the unthinkable happens–a button pops off my jacket. I’m able to chase down the button–half the battle on a subway grate-filled block–and think “Do I walk all the way home and get a different top?” even though I’d really rather not…
Be Thrifty to the rescue! One 2 dollar sewing kit from the bodega across from the office and a few minutes later, my button is securely back on my blazer, ready to be secured for warmth on this unusually blustery August day!
I know, sewing a button isn’t brain surgery, but I’m always afraid my poor handiwork will cause the button to fall off again and I won’t be lucky enough to recover it a second time. Using the instructions below, I am fully confident in my button’s stability–maybe I’ll even re-attach the other one for peace of mind!
Button-Sewing 101 from Be Thrifty
Button-sewing is phenomenally easy, so don’t be discouraged by the number of steps below–this technique is particularly good for staying power. To sew on a coat button, use extra-strong thread, or try unwaxed white dental floss. (Color the floss with a marker to match the button)

Re-attachement in progress
Tools: Button; needle; thread; scissors
1. Thread a needle, double the thread over, and knot the end twice.
2. Starting from the underside of the fabric, make two stitches, one on top of the other, where you want to affix the button. This anchors your knot.
3. Hold the button over the “anchor” stitches and pull the threaded needle through from the underside and up through one of the button’s holes. Go back down an adjacent hole. Don’t pull the stitches too tightly–you want wiggle room so you can button the garment when you’re done.

All done–good as new!
4. Do this three times, then repeat for the other two holes if the button has four holes. There’s no need to make crisscross stitches over the button–just a few loops through both sets of holes will do the trick.
5. Pull the button slightly away from the fabric and wind the remaining thread several times around the stitched thread, under the button and above the fabric.
6. Push the needle back through the fabric and knot on the underside, then make a few small stitches over the knot to secure the button.
7. To make your work last, put a drop of clear nail polish over the thread on top of the button.


2 Comments
Diane
August 19, 2010 at 6:17 pmWe should all be so thrifty…I am one of those people who saves extra buttons that come with my clothes, but I never have to use them! Now I have a huge assortment of buttons. Sewing your button back on is always a good idea–provided you have the right color of thread handy.
偷情
March 3, 2011 at 11:34 amI personally believe there is a knowlege to writing articles that only a few posses and frankly you have it , you genius.2