There’s a distinctive sound drywall makes when it gets punched with a stray furniture leg or burdened to the breaking point with an improperly secured shelf—a sickening crunch followed by an agonizing cracking noise. If you haven’t heard this, you will someday, and when that day comes you’ll want to know how to patch a hole in drywall. Depending on the size of your puncture (from nail hole to gaping abyss), there are different techniques to fix it. Pick your poison from the instructions below, excerpted from Sharon and David Bowers’s Shop Class for Everyone.
PATCH A TINY HOLE
Nail and screw holes, along with other small punctures, can be covered over directly with drywall joint compound, aka putty, patching compound, or mud. (In a move-out pinch, you can use toothpaste on white walls to plug tiny holes. Just don’t tell your landlord.)
Tools
Fine sandpaper
Rags
Flexible 4” putty knife
Materials
Drywall compound
Steps
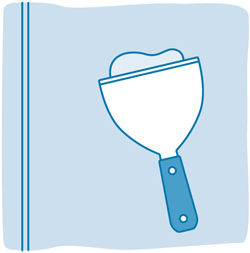
Sand around the hole to flatten any rough spots. Wipe away any sanding dust with a wet rag and let the area dry.
Use a putty knife to apply drywall compound. Place a small amount directly into the small hole and then smooth it flat to the wall with the wide blade of the putty knife. Let it dry for about 2 hours and then apply a second layer if needed.
Sand the putty smooth, if needed. Dab the patch with paint to match the wall.
PATCH SMALL HOLES
If it’s bigger than the size of a quarter but smaller than 8″ × 8″, you’ll need to repair the hole with an adhesive wall patch as well as drywall compound.
Tools
Rough sandpaper
Medium sandpaper block
Utility knife
Putty knife
Rags
Materials
Adhesive wall patch
Drywall compound
Texture spray
Paint
Steps
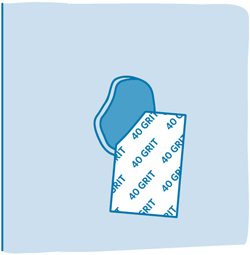
Remove any loose drywall in or around the hole. Use a utility knife to free any dangling pieces and to trim the edges of the hole until smooth. Finish cleaning the hole with coarse sandpaper.
Cover the hole. Fit an adhesive wall patch over the hole, extending around it several inches in each direction. It should look like you’ve covered the hole with cheesecloth. This is the backing against which you will apply drywall compound. A slightly larger hole, around 8″ × 8″, would require a galvanized metal patch, also available at your local hardware store.
Smooth out the patch. Use a putty knife to apply drywall compound over the wall patch. Starting out past the edges and moving toward the center, smooth the compound to completely cover the patch. You may need to let the edges of the patching compound dry for 15 or 20 minutes so that it can support the putty in the center of the wall patch. Don’t worry about making the putty exactly smooth now—you’ll sand it in the next step. Let the patching compound dry overnight.
Smooth again. Use fine sandpaper stapled to a wood block or a similar sanding tool to smooth the patching compound. Be aware that a somewhat flimsy adhesive patch is the only thing backing your hole, so pushing firmly into it while sanding is likely to crack the compound. Wipe away any sanding dust with a wet rag and let dry.
Paint the patch. Cover the patching compound with paint that matches the surrounding wall. If the wall is textured, spray it with wall texture spray to match, let dry overnight, and then paint.
PATCH MEDIUM HOLES
If your hole is greater than 8 inches square, you’ll need to repair it with a Sheetrock plug. Common drywall (aka Sheetrock) is gypsum paste poured and hardened between sheets of paper. It can be cut to shape and used to plug large holes for a sturdier fix.
Tools
Utility knife
Measuring tape
Pencil
Medium sandpaper block
4” putty knife
Materials
Square piece of drywall
Drywall compound
Texture spray (optional)
Paint
Steps
Remove any loose drywall in or around the hole. Use a utility knife to free any dangling pieces and to trim the edges of the hole until smooth. Finish cleaning the hole with coarse sandpaper.
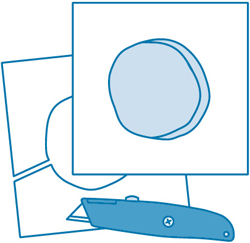
Make the plug. On a square of drywall at least 2 inches wider than the hole on all sides, draw the shape of the cleaned and prepped hole. (Trace it first if it’s too irregular to freehand.) Use a utility knife to cut out the shape of the plug through the first layer of paper and also through the gypsum core, but leave the second layer of paper intact. It’s better to cut the plug a little too big rather than too small, so cut around the outline to be safe.
Fit the plug. Shave the edges of the Sheetrock plug with a utility knife until it fits snugly in the wall hole.
Slot the plug into the hole. Position it with the intact layer of Sheetrock paper on the outside. If needed, trim the drywall paper so that it overlaps the dimensions of the hole by about an inch on all sides.
Attach the plug. Spread a thin layer of drywall patching compound on the side of the paper that lies flush against the wall and press the paper firmly to the drywall around the hole to stick the plug in place.
Finish the plug. Use a putty knife to patch the plug with drywall compound so that it’s smooth and flush with the wall. Paint the patch. Cover the patching compound with paint that matches the surrounding wall. If the wall is textured, spray it with wall texture spray to match, let dry overnight, and then paint.
PATCH LARGE HOLES
A hole of more than about a square foot in area requires something more than an adhesive patch or a drywall plug to properly fill it. In this case, you’ll need to frame the back of the hole with a 2 × 4, and then attach a larger drywall patch to the frame.
Tools
Utility knife
Measuring tape
Handsaw
4” putty knife
Medium sandpaper block
Materials
Scrap 14 ½” 2 x 4
Framing nails or wood screws
Drywall
Drywall screws
Drywall compound
Texture spray (optional)
Paint
Steps
Square up your hole. Use a utility knife to cut the hole to a good approximation of a clean rectangle, extending toward the vertical wall studs on either side of the hole.
Frame the hole. Cut one or more sections of scrap 2 × 4 to 14¼” lengths. These 2 × 4s will span between framing studs; use enough 2 × 4s to reduce the size of any hole to less than a foot per side. Place these sections in the hole horizontally between the wall studs. Nail or screw the backing wood in place by reaching into the wall and nailing the 2 × 4s diagonally through the backing wood and into the studs.
Plug the hole. Draw the dimensions of the hole onto a piece of drywall and cut out the plug with a utility knife. Use drywall screws to attach the plug to the 2 × 4 backing and to any exposed vertical studs.
Finish the patch. Use a putty knife to patch the plug with drywall compound so that it’s smooth and flush with the wall. Paint the patch. Cover the patching compound with paint that matches the surrounding wall. If the wall is textured, spray it with wall texture spray to match, let dry overnight, and then paint.
More About Shop Class for Everyone: Practical Life Skills in 83 Projects

Did you remember your goggles?
There used to be a time when pretty much every high school offered Shop class, where students learned to use a circular saw or rewire a busted lamp- all while discovering the satisfaction of being self-reliant and doing it yourself. Shop Class for Everyone now offers anyone who might have missed this vital class a crash course in these practical life skills. Packed with illustrated step by step instructions, plus relevant charts, lists, and handy graphics, here’s how to plaster a wall, build a bookcase from scratch, unclog a drain, and change a flat tire (on your car or bike). It’s all made clear in plain, nontechnical language for any level of DIYer, and it comes with a guarantee: No matter how simple the task, doing it with your own two hands provides a feeling of accomplishment that no app or device will ever give you.


No Comments