Celebrate life with a twist on the traditional May flower wreath, excerpted from Caitlin Atkinson’s Plant Craft.
One of the time-honored ways to commemorate May Day, an ancient celebration of spring, is by making a flower wreath. Instead of making a customary floral wreath, welcome the power of nature into your home with a living wreath. Although traditionally the wreath decorates a door until the day of St. John the Harvester (June 24), the idea of hanging a living wreath at any time of year is a wonderful way to celebrate life. This living wreath can be displayed on or near a front door or on a table as a centerpiece.
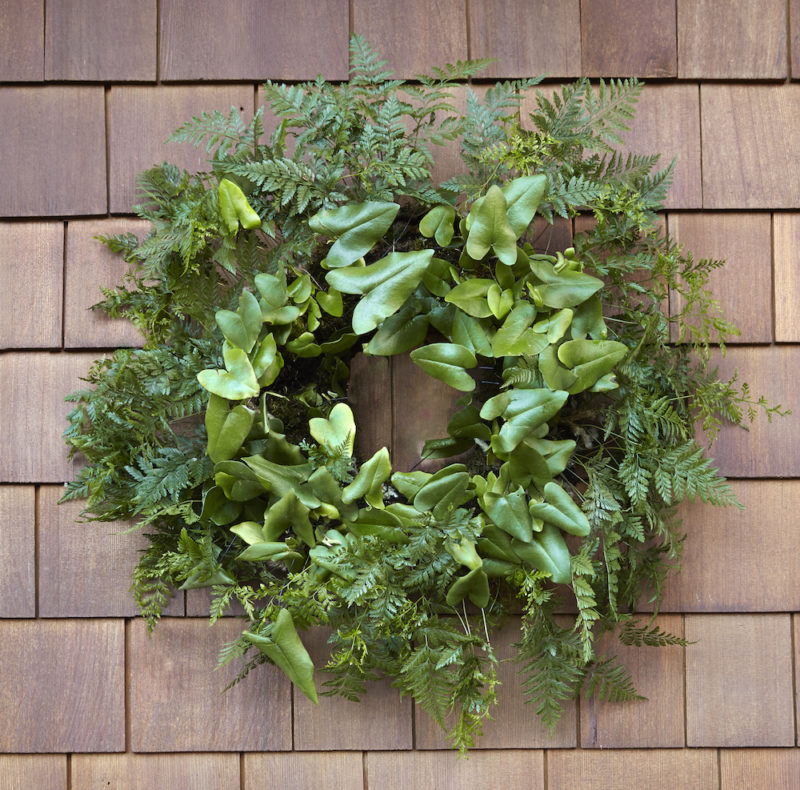
I used two epiphytic ferns to create a rich, green wreath. The rabbit’s foot fern has beautiful lacy fronds and fuzzy feet. The sweet heartleaf fern is a dainty fern with dark green fronds that grow on dark stems. The heartleaf fern is used in the center of the wreath, while the larger rabbit’s foot fern stretches along the outer edges of the wreath. When planting the rabbit’s foot fern be sure to leave the furry feet exposed—the fur is actually rhizomes that need to remain exposed to take up water. The epiphytic bird’s nest fern would be a good fern substitution. In place of the ferns you could opt for two types of peperomia. The heart-shaped leaves of peperomia have a variety of colors and textures and they would look great planted in a wreath.
I used a frame specifically made for living wreaths—it’s available online at Topiary Art Works (see Resources). It looks like two flat wreath frames attached together with rings. This frame makes it easier to use moss and soil to support the plants and has built-in feet to bump it out from the wall. I highly recommend using the same frame.
I display my wreath outside at my home’s entryway to welcome guests. This spot does not receive direct sun during the day; this is important for the ferns, which will burn in the sun. If you live in a climate that has a cold winter wait until all danger of frost has passed in your area before considering placing the wreath outside. Once nighttime temperatures drop below 60°F you should bring it in overnight. I bring the wreath indoors when the weather gets cold and display it as a centerpiece lying flat on a saucer. The saucer protects the table from the moisture and humidity of the planting.
If you have concrete walls you can hang the wreath directly on a wall inside, but I do not recommend displaying the wreath on a wall indoors if your walls are made of drywall. Even though the wreath frame has feet that push it away from the wall the moisture and humidity from the moss can stain the wall or grow mold on the wall if the wreath is displayed there over a long period of time. If you really want to display it inside on an interior wall consider making a plastic back for the wreath frame out of a plant saucer or plastic liner.
Living Wreath
Materials
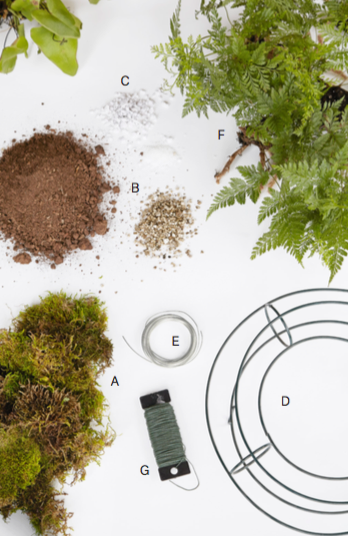
- Sheet moss (A)
- About 1 gallon of African violet planting mix (B)
- 1 teaspoon water-retaining polymers (C)
- 11-inch living-wreath frame (D)
- 50 feet of 22-gauge aluminum wire (E)
- Twenty to thirty 2-inch rabbit’s foot and heart ferns (F)
- U-shaped florist pins or florist wire (G)
Tools
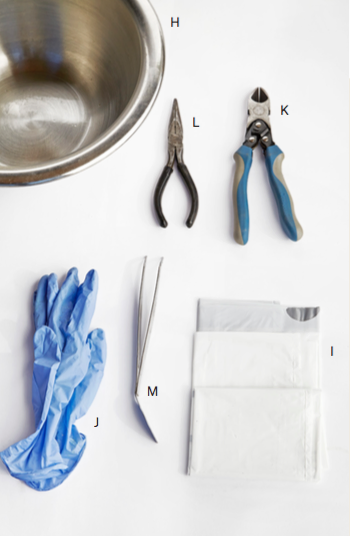
- 2 bowls (H)
- Garbage bag (I)
- Gloves (J)
- Wire cutters (K)
- Pliers (L)
- Large tweezers (M)
Steps
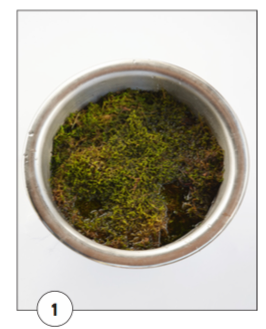
Soak the sheet moss in a bowl of water overnight. Squeeze out the excess water.
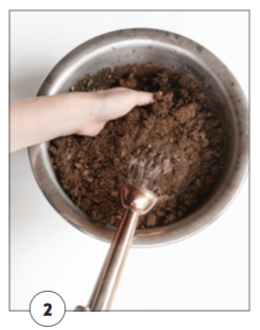
Use another bowl to mix the African violet planting mix and water-retaining polymers. Add water a little at a time until the mix is saturated and allow the mixture to rest for at least an hour.
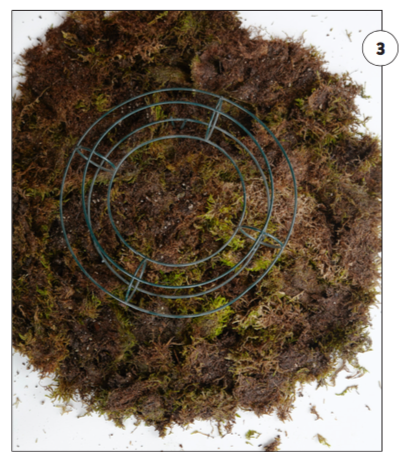
Spread the garbage bag on a work surface and lay enough sheet moss on it moss-side down so that the sheet moss covers an area twice as large as that of the frame. If your pieces of moss are small, overlap the pieces so that there aren’t any bare spots in between them.
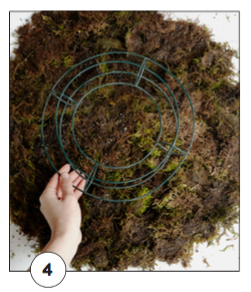
Place the frame in the center of the sheet moss.
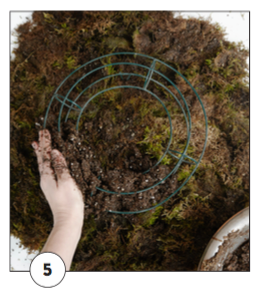
Layer the planting mix onto the frame.
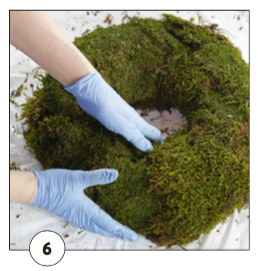
Wearing gloves, pull the sheet moss up through the center of the frame and over the frame and planting mix. Then begin to pull the moss from each of the four corners up and over the frame and planting mix. Cover the frame and planting mix completely with moss, patching any area that needs more moss. It might seem a bit messy and overwhelming, but just keep going, adding moss in spots where the soil is spilling out.
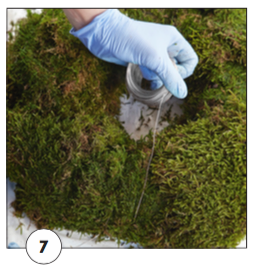
Begin wrapping the aluminum wire around the moss, planting medium, and frame. Make the first loop by slipping the wire under and once around the wreath and securing the wire to itself using the pliers—it should be snug so that the loop stays in place and the wire doesn’t come undone as you continue wrapping it around the wreath. Continue wrapping the wire around the wreath, leaving a finger’s width of distance between each loop of wire. Pull the wire tight as you wrap and patch any spots missing moss.
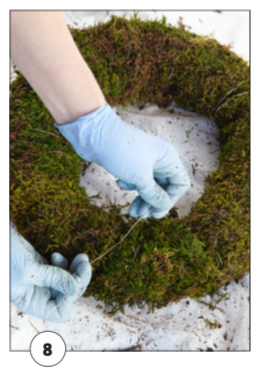
Once you get back to where you started twist the ends together to secure the wire.
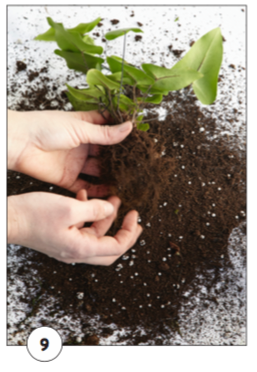
Loosen the plants from their containers and remove the excess soil.
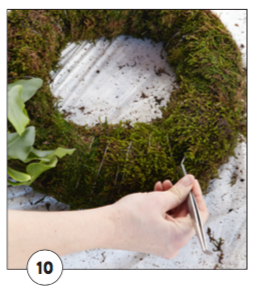
Use the end of the tweezers or a screwdriver to pry open the moss and make a small hole for a plant. Place the roots of the plant in the hole. It may help to keep the tweezers in the hole, holding the moss open while you place the plant in the hole. Repeat with the remaining plants.
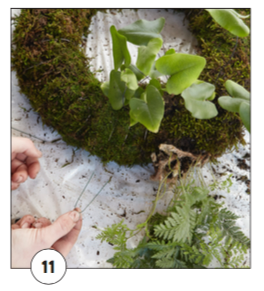
If the plants feel loose use a U-hook or make a V-shaped hook out of florist wire to secure them until they have time to establish themselves. Leave the wreath lying flat and away from direct light for the first few weeks so that the plants have a chance to establish themselves.
WATER

Mist the wreath daily to increase the humidity around it. Be sure to mist the feet of the rabbit’s foot ferns. Do not let the wreath dry out completely. Feel the wreath and lift it to get a sense of its weight to determine when to water.
If you have a tub or bin, water the wreath by submerging it entirely in water for about 10 minutes. Remove from the water and allow it to drain before you rehang it. Or take the wreath down and gently shower it with water, then let the wreath sit for 10 minutes and then shower it again. Let the wreath drain before you rehang it.
LIGHT
Hang the wreath in a spot that gets indirect bright light. Direct sun will burn the ferns.
FERTILIZER
Fertilize with all-purpose fertilizer using about 1/4 dose a few times during the growing season (spring and summer).
MAINTENANCE
The wreath will change over time and may need to be replenished or pruned. Rabbit’s foot ferns can grow large, so you will need to keep them trimmed to maintain a tidy appearance.
For more plant crafts, check out the book below!
 About the Book:
Discover the simple beauty of adding natural style to a space!
Not everyone has a garden—but with only a handful of materials and a little bit of time, everyone can bring the beauty of nature into their home. Plant Craft features projects inspired by the natural world and made out of live plants, cut flowers, foraged branches, and more. You’ll learn how to create a colorful floral mural, an elegant table centerpiece, a serene underwater sculpture, a whimsical mobile, and more. The step-by-step instructions are clear, easy to follow, and fully illustrated with color photographs, and the projects vary in difficulty. Given the right care, they all have the potential to grace a home for a long time.
Buy the Book
Amazon | B&N | Indiebound | Workman


No Comments