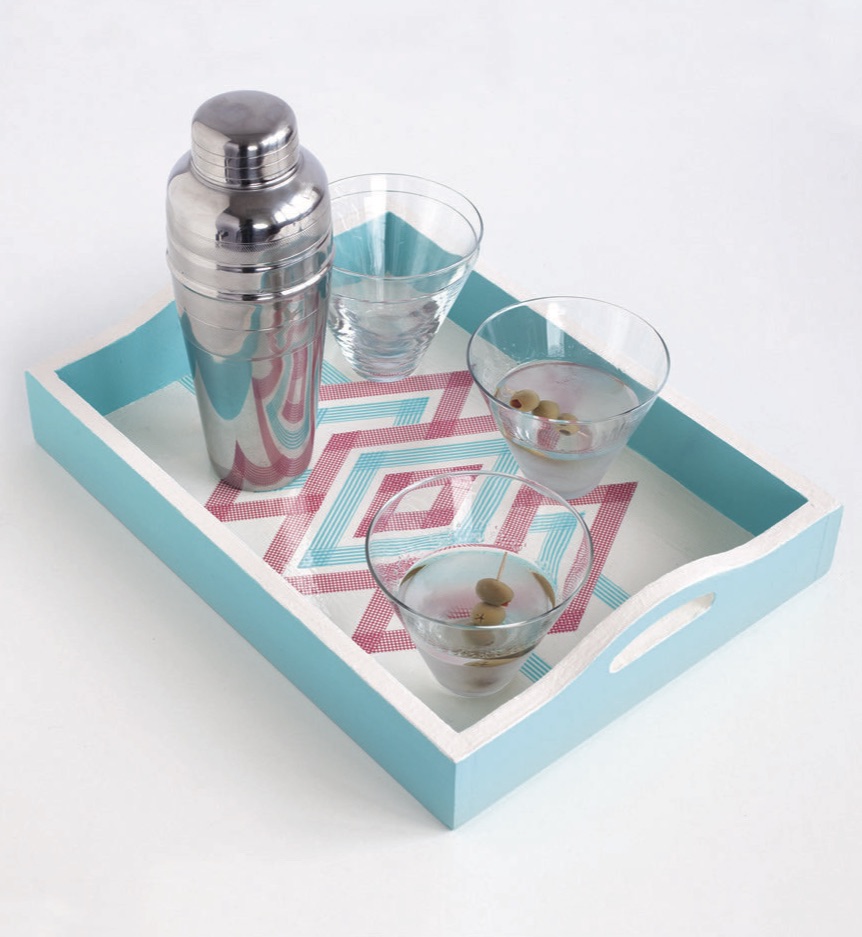
Trays are incredibly useful items in almost every room, whether they’re helping serve up breakfast in bed, holding small trinkets on a coffee table, or organizing items in the bathroom. Use this method of arranging washi tape to customize a tray for your home. Bonus: Trays are one of the most readily available craft surfaces ever—you can find them at craft stores, mass retailers, even thrift shops.
Supplies
- Unfinished wooden tray
- Paintbrushes
- Acrylic paint, in two colors that coordinate with your washi tape
- Ruler
- Pencil
- Washi tape, in 2 colors
- Craft knife
- Spray acrylic sealant
Steps
1. Coat the entire tray with acrylic paint. Let it dry.
2. Use the ruler and pencil to lightly mark the center of the tray, then arrange 4 strips of tape in a diamond shape around the center point. Cut 4 more strips of tape in a different color, and arrange them around the first diamond, creating a second diamond. Repeat a third time with slightly longer pieces of tape, in a different color, to create another, larger diamond. Cut the ends of the tape strips so the vertices of the diamonds meet cleanly.
3. Add diamonds on either side of the central diamond with washi. Trim with a craft knife where the tape overlaps.
4. Arrange a strip of washi tape so it extends from each of the outer diamonds to each side of the tray. Cut the ends so they’re even with the sides of the tray.
5. Spray a layer of acrylic over the surface of the tray to seal the tape. Let it dry completely, 24 to 48 hours, before using.
6. To clean the tray surface, wipe it with a damp paper towel.
Excerpted from Amy Anderson’s Washi Tape Crafts.


No Comments